Connectors
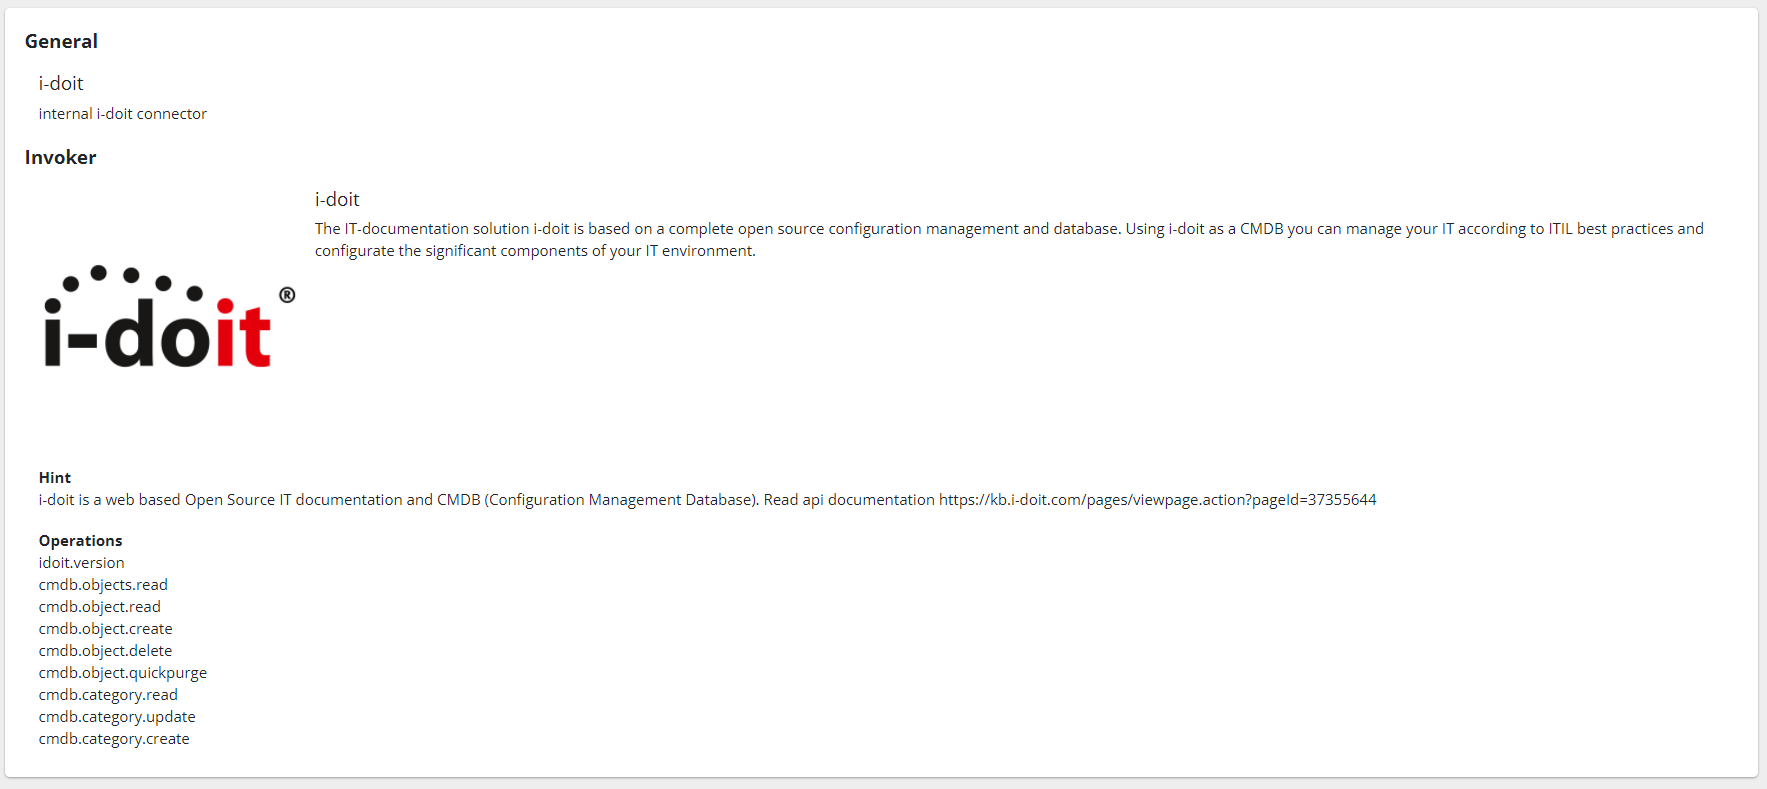
Connector is a core component in OpenCelium. It is a system to which we will send requests and get responses. They can be different throw different protocols: HTTP, JSON-RPC, SOAP, and so on. Currently, HTTP and JSON-RPC are available. Connector uses invokers. Invoker is a special file filled in with instructions.
Each item of the connector’s list displays a title and an icon. The grid view provides also description and invoker name.

Viewing the connector you can read a description of the connector itself and information about invoker to which it was assigned, like: title, description, hint, and operations.
The title you can change directly inline double clicking on its text.
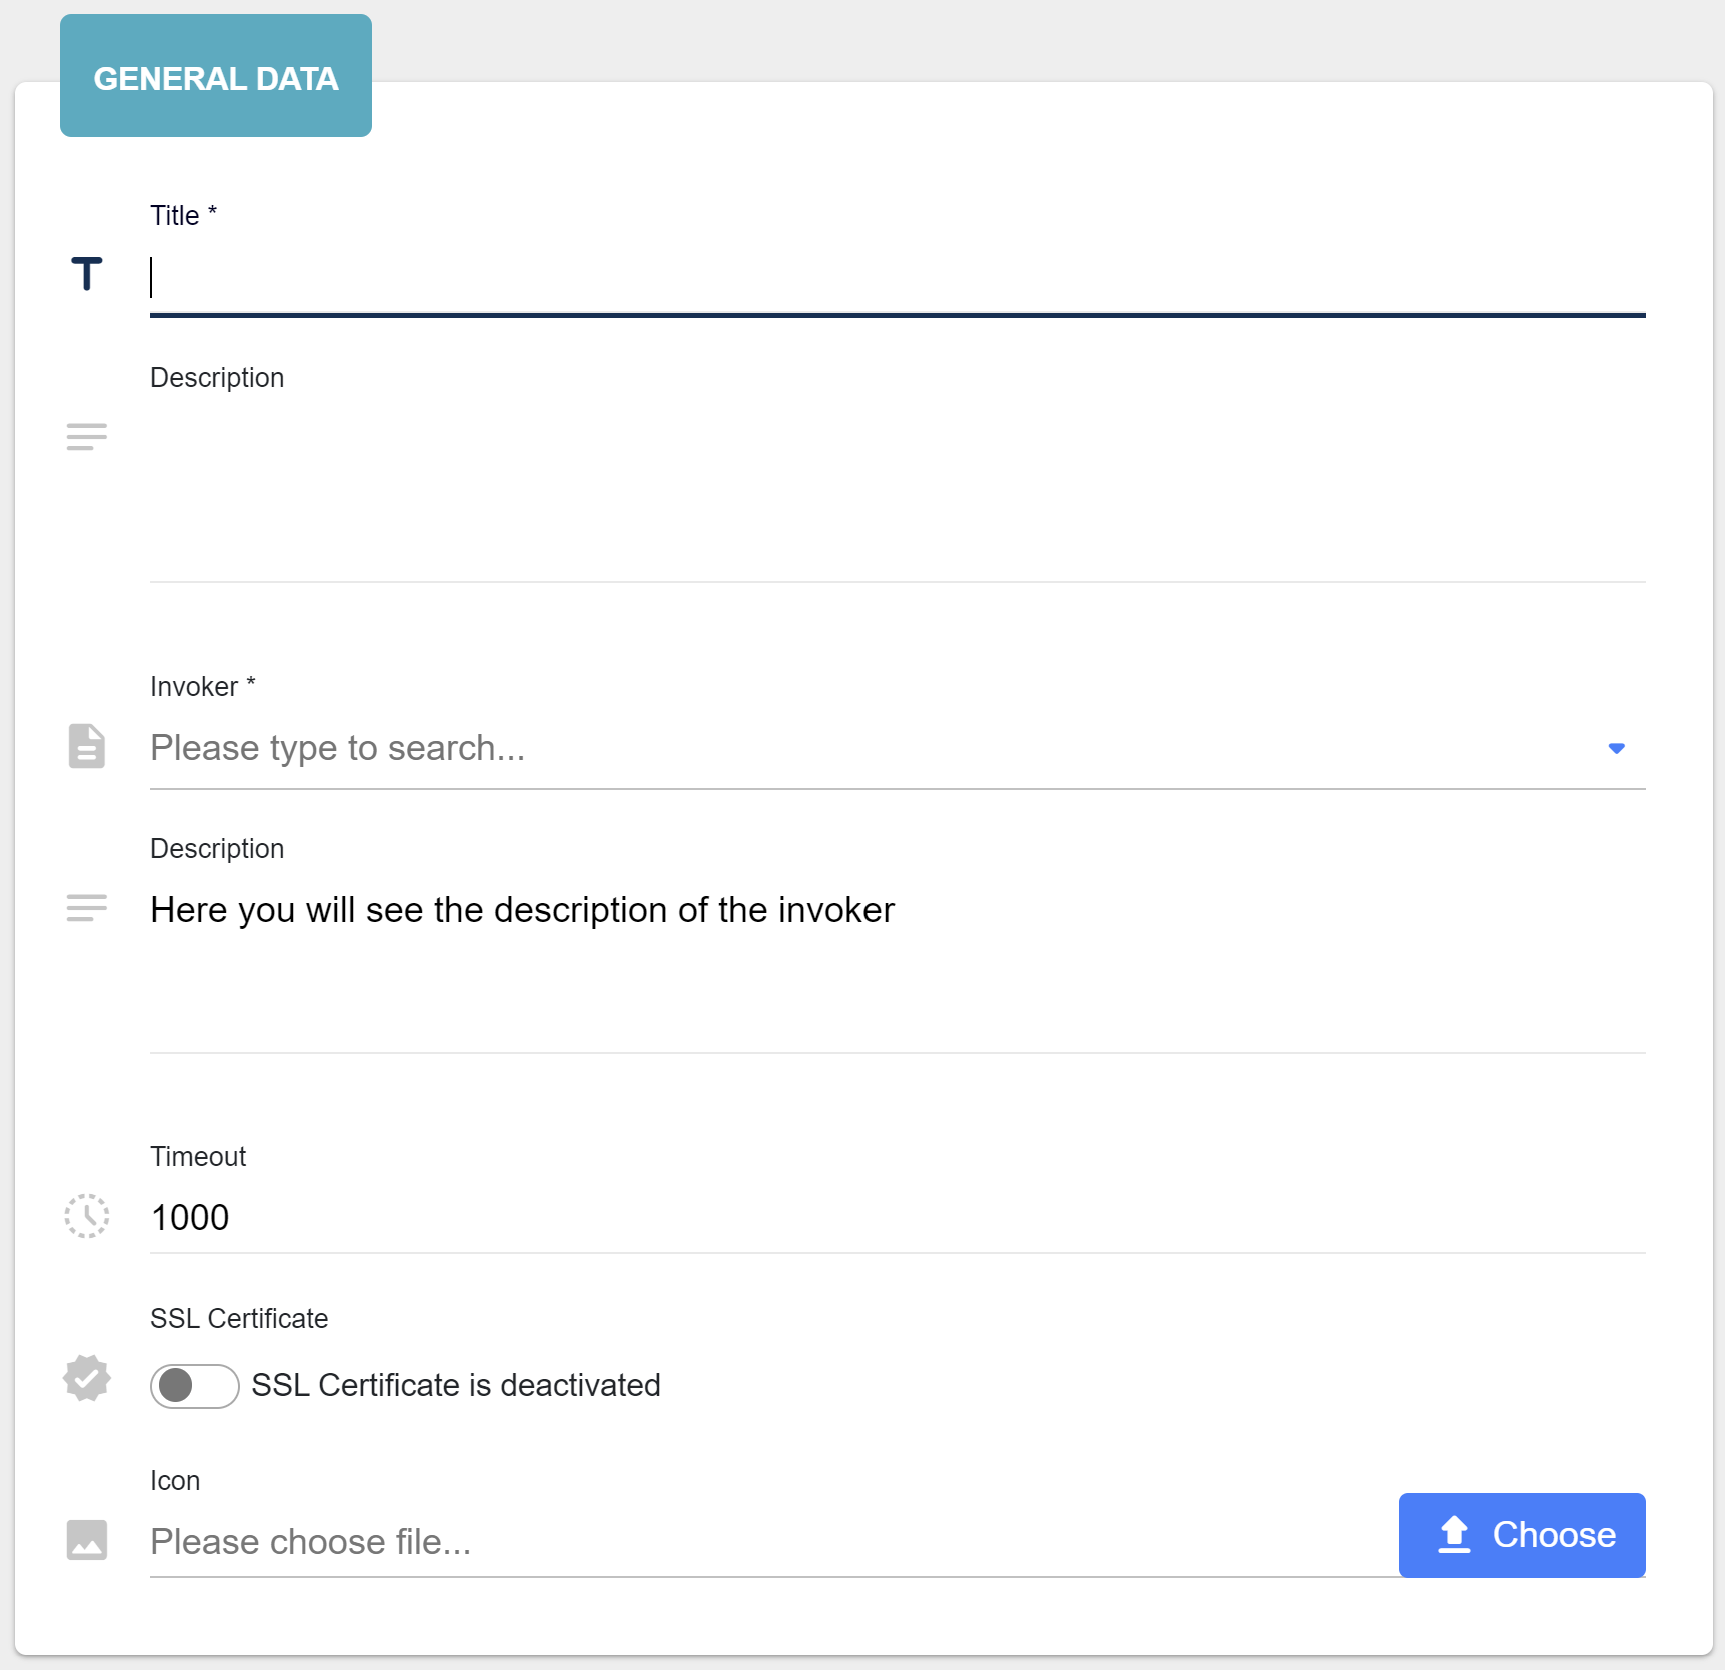
Adding/Updating connector consists of two steps: general data and credentials. General data step has four input fields: title, description, invoker, invoker description, timeout, ssl certificate and icon. The title and invoker are required fields. The timeout is a timeout for connection; has a default value equals to 1000. The ssl certificate flag enables/disables the secure protocol; disabled as a default.
Credentials step has several input fields. We need this step to set up a connection to the system that describes invoker. A type of field depends on the chosen invoker. Different invokers have different authentication systems, that are described inside of the invoker. All fields usually are required. If the invoker has a password field, you can click on the checkbox on the right to see what you are typing instead of asterix. Before adding/updating you test the connection. If it was completed successfully you can finish the process.
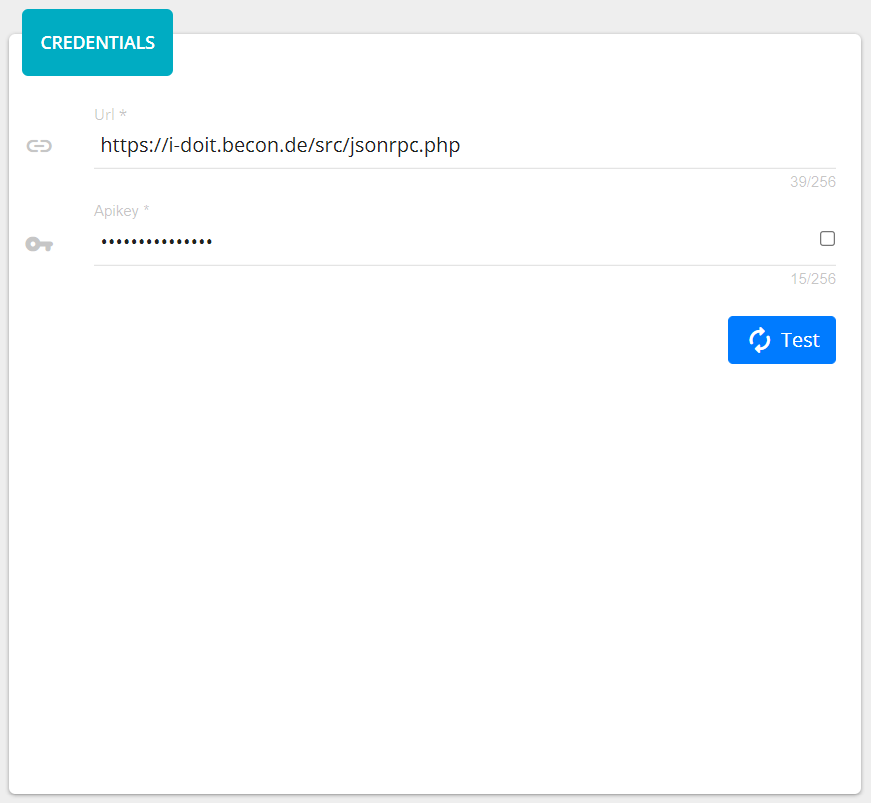
After filling all data you can test your credential data pressing on the Test button. If it is failed, you will be notified.

After adding a connector you will be redirected to the list. You can also press on Add & Go to Add Connection, if you want to be redirected to the create connection page. The adding can be easily canceled and drive you to the list pressing on the cancel button.

Master Password
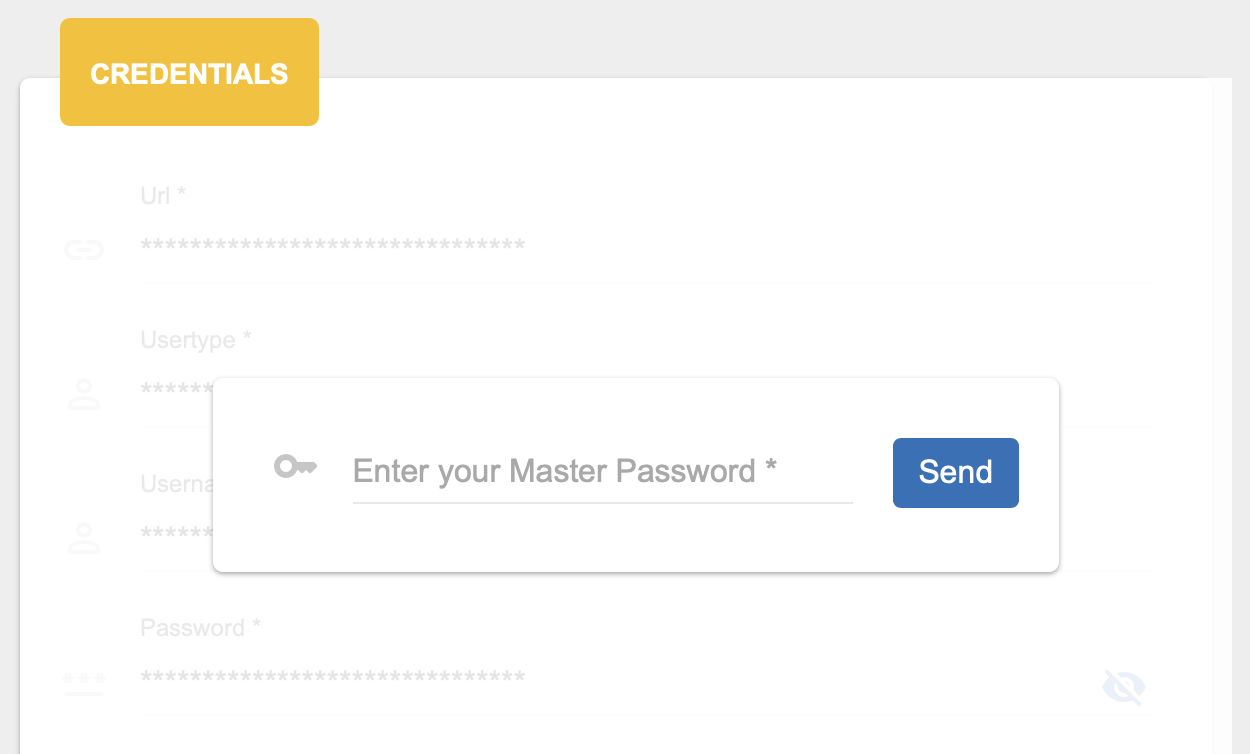
The Master Password is a function for protecting the credentials of a connector. Normally, the information for authentication to an API is stored in the respective connection and can be viewed.
To protect this sensitive data, it is possible to activate the master password. This means that the credentials are only visible once the corresponding password has been entered.
To activate the function, you must make an entry in the application.yml and set the desired password.
Open the application.yml that can be found under the following path:
/opt/opencelium/src/backend/src/main/resources/application.yml
Add the following entry underneath opencelium
opencelium:
   [...]
   connector:
      master-password {YOURPASSWORD}
Save the file and restart the backend.
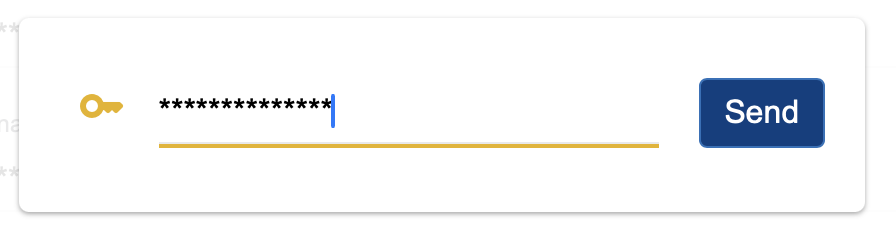
After restarting and logging in again, the function is active. Enter the password you have set. After confirmation, the credentials are displayed.
Note
If the master password has been entered, the credentials of all connectors are displayed until the browser is closed again.